Environments and runtime specification
- Platform-managed environment with pre-installed packages
- Python version:
3.x
NexusOne ships with the latest supported version.
Capabilities
JupyterHub offers several core features and use cases that are popular today.Key features
- A browser-based notebook interface that requires no local installation.
- An integrated Spark session that’s available directly from Python notebooks.
- Built-in support for Trino SQL queries.
- Ability to mix documentation, code, and output in a single file.
- Access to shared utilities,
utils, and an Airflow DAGs folder,dags. - Optional terminal access for scripting and running batch workflows.
Use cases
JupyterHub is often recommended for the following use cases:- Building or testing PySpark transformations
- Data quality validation workflows
- Rapid prototyping before building an Airflow DAG
- Small-scale analytics and interactive SQL queries
- Investigating raw data stored in Iceberg, Hive, and S3
- Trying out Python libraries, utilities, or custom logic
- Debugging table issues, lineage, or schema mismatches
Authentication
JupyterHub uses NexusOne’s standard authentication flow:- Single Sign-On (SSO)
- OAuth 2.0 or OpenID Connect
User access and permissions
NexusOne’s security layer manages access to the following:- IAM groups grant JupyterHub access.
- Ranger policies grant access to datasets, Hive metadata, Iceberg tables, and S3 object storage.
- IAM users have access to view or interact with the data sources and storage locations when authorized.
Exploring the JupyterHub UI
This section explores the JupyterHub UI and how to navigate it. Before exploring these, you can launch JupyterHub using the following designated URL:When you purchase NexusOne, you receive a client name.
Replace
client with your assigned client name.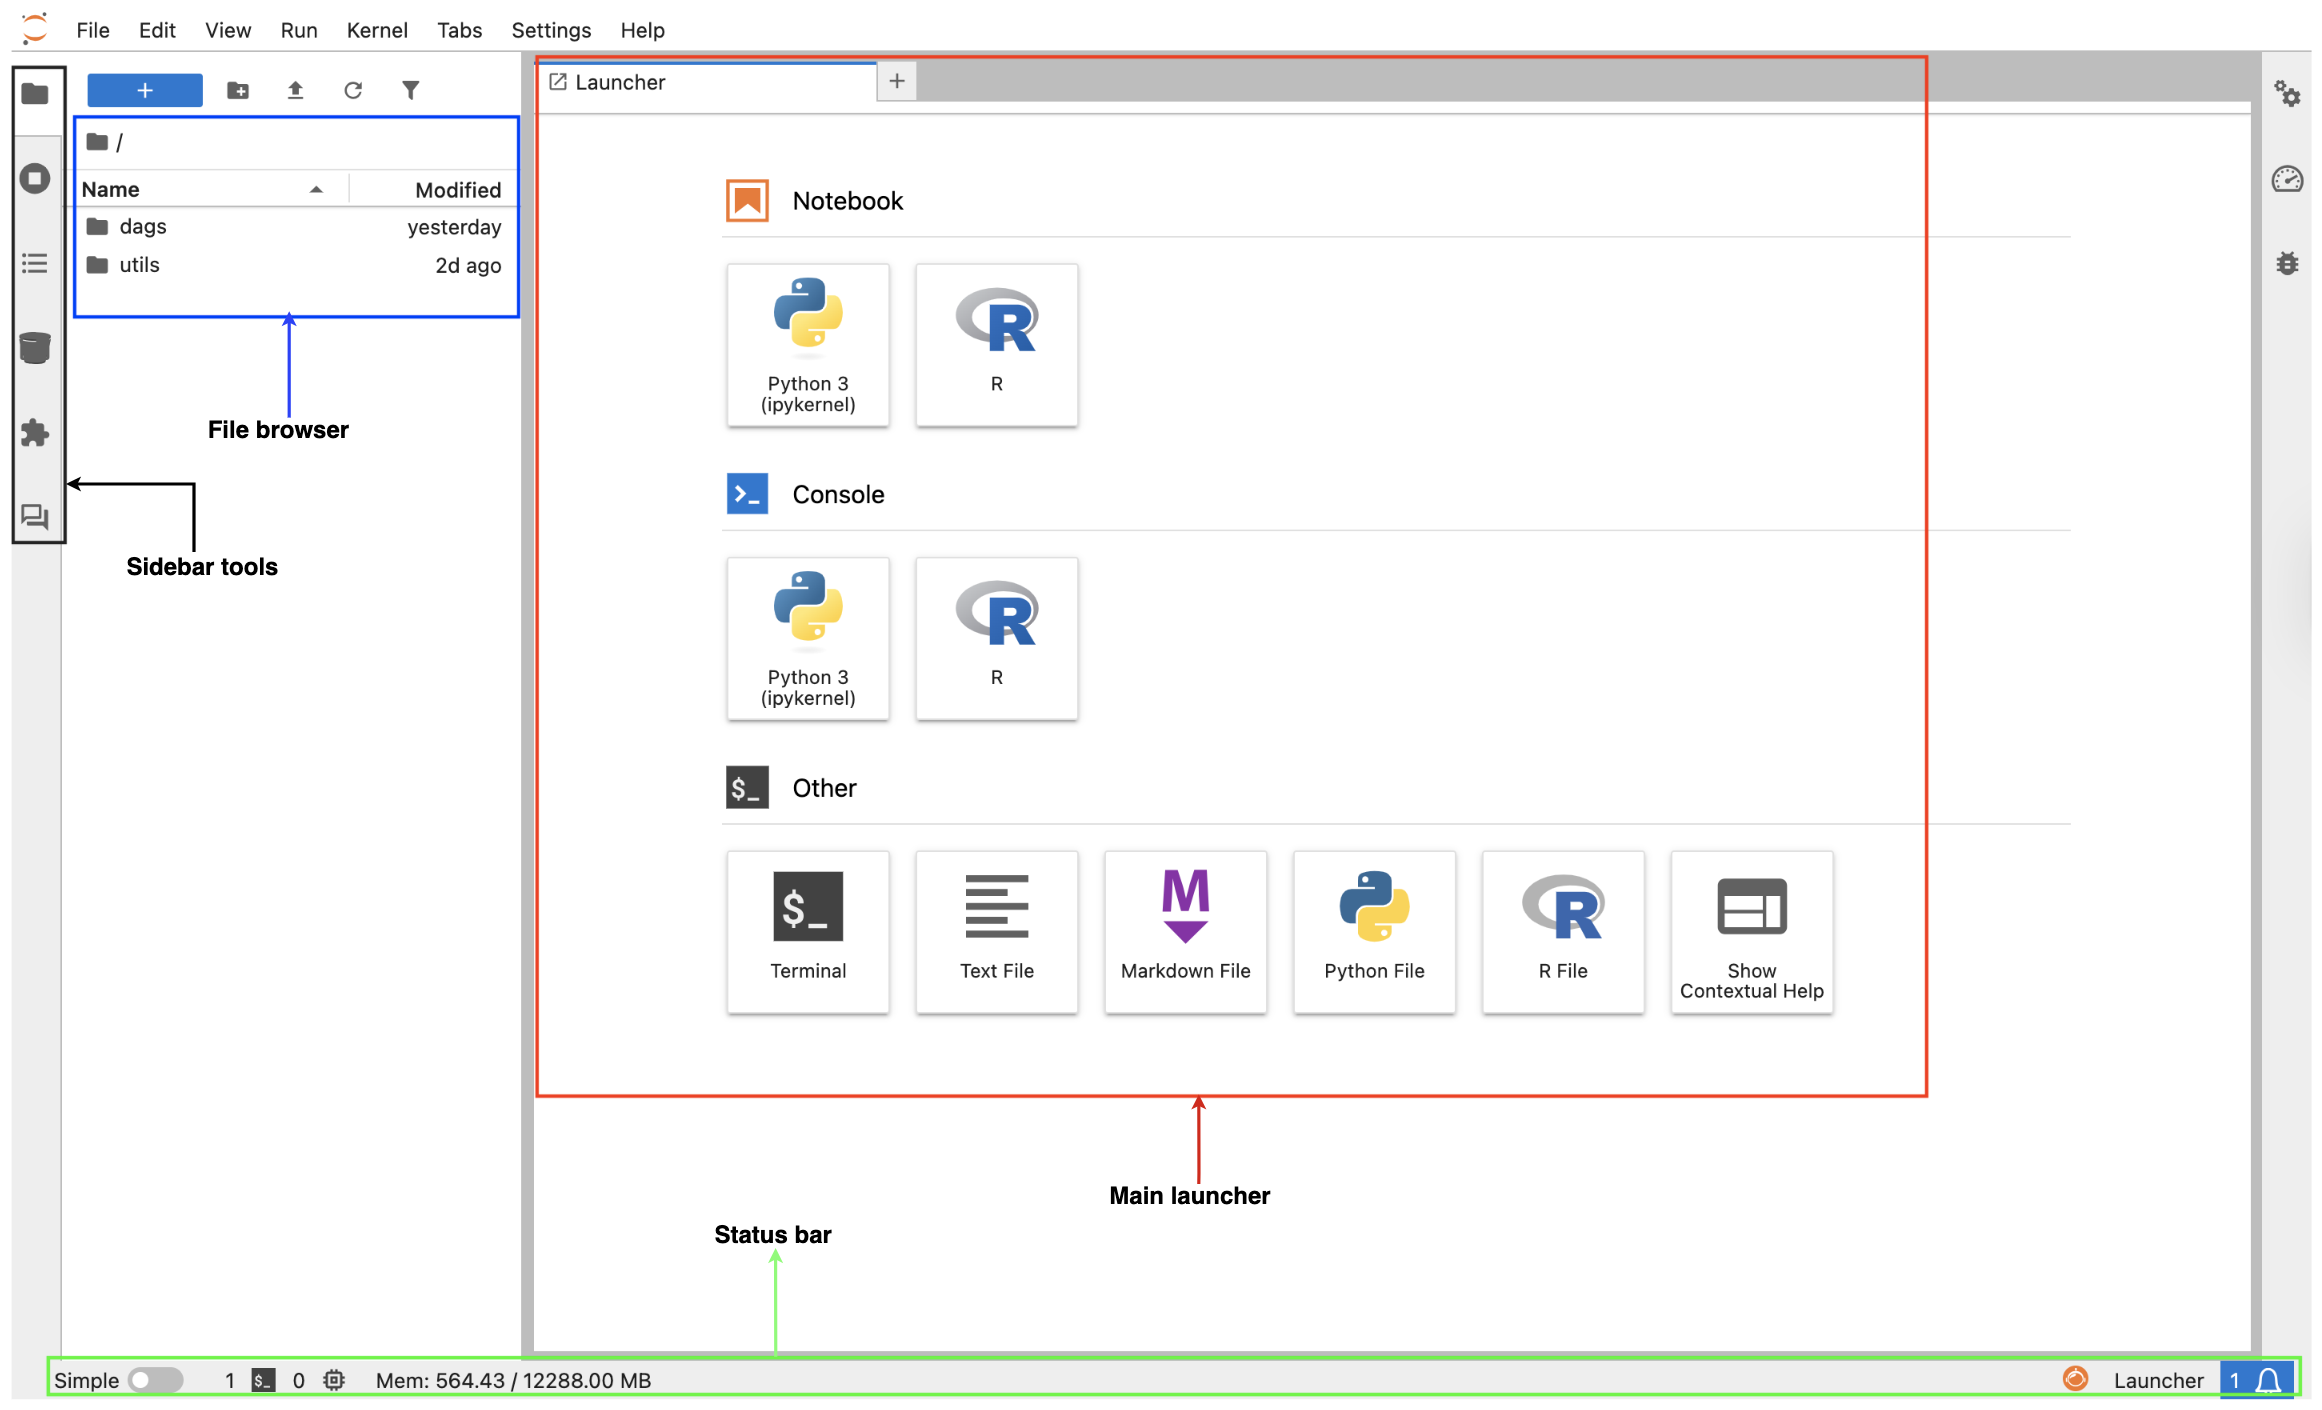
JupyterHub homepage layout
File browser
As seen in the previous image, the top left panel displays your workspace directory. When you launch a JupyterHub environment in NexusOne, you should see the following folders:-
dags/- This folder is automatically synced with Airflow.
- Any
.pyfile placed here becomes visible to the Airflow scheduler. - Use this location to develop, test, and maintain Airflow DAGs.
- Don’t store temporary notebooks or test files here.
-
utils/- This is a shared utilities folder, mounted into every Jupyter session.
- Contains common helper functions, shared logic, configuration parsers, and reusable modules.
-
You can import utilities from here directly into notebooks or DAGs:
- Creating new folders
- Uploading or downloading files
- Managing files by renaming, copying, or deleting them
Main launcher
As seen in the previous image, the center panel displays the main launcher. It lets you create notebooks, terminals, and other file types. The Launcher contains the following sections, Notebook, Console, and Other.Notebook section
This section displays the available notebook kernels.- Python 3 ipykernel: The primary kernel used for the following use cases:
- Data exploration
- ETL validation workflows
- PySpark development
- Trino queries through Python libraries
- R Kernel: Used for R-based analysis and visualizations
Console section
An interface that sends commands directly to the Python or R kernel and returns output immediately. It does this without creating notebook cells or storing the interaction as a document. It’s useful for:- Quick variable checks
- Running isolated code without creating notebooks
- Testing Python or Spark one-liners
Other section
This includes tools and file templates inside JupyterHub.- Terminal: Opens a real shell session on the Jupyter server for the following:
- Navigating directories
- Running scripts
- Installing user-level Python packages
- Text file: Creates an empty file with a
.txtfile type - Markdown file: Creates an empty file having a
.mdfile type It’s useful for writing documentation or notes. - Python file: Creates an empty file with a
.pyfile type - R file: Creates an empty file with a
.rfile type - Show contextual help: Opens a help panel with documentation for JupyterLab features
Status bar
As seen in the previous image, the bottom panel provides information about the current status of the environment, such as:- Active terminal count
- CPU usage
- Current kernel
- Memory usage
- Notebook mode
Sidebar tools
As seen in the previous image, the top left sidebar provides quick access to all major tools available in your environment. Each icon represents a specific feature, and understanding these helps you navigate and manage your work efficiently.File browser
You can view your workspace directory and all the files and folders available in your Jupyter environment. Some of the key features include the following:- Access mounted platform folders such as:
- The Airflow DAGs folder,
dags/ - The shared helper library,
utils/
- The Airflow DAGs folder,
- Upload and download files
- Create, rename, delete, or move files
- Use the drag-and-drop to add files from your local machine or organize files into respective folders within JupyterHub.
- Creating folders for your projects
- Editing or placing DAG files
- Opening notebooks
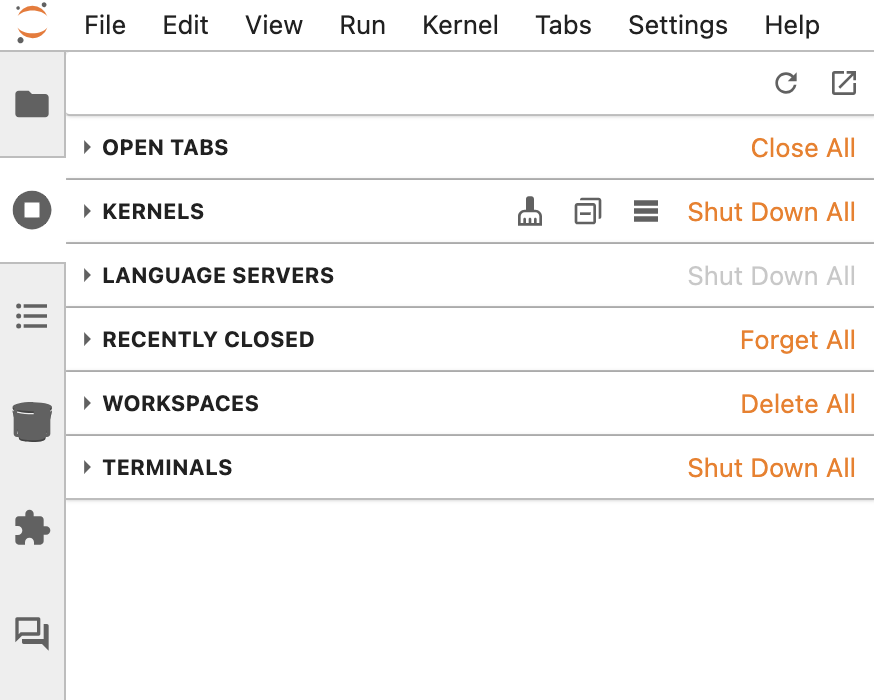
Running terminals and kernels
You can display all currently running processes, such as:- Active kernels
- Active notebooks
- Open tabs
- Open terminals
- Restarting a stuck notebook kernel
- Cleaning up forgotten terminals
- Monitoring your active background jobs
Table of contents
You can automatically generate a structured outline of your notebook based on markdown headers. Some of the key features include the following:- Navigating large notebooks easily
- Jumping quickly between sections
- Helps you maintain readable notebooks with proper documentation
- Notebooks with heavy documentation.
- Presentation-style notebook flows.
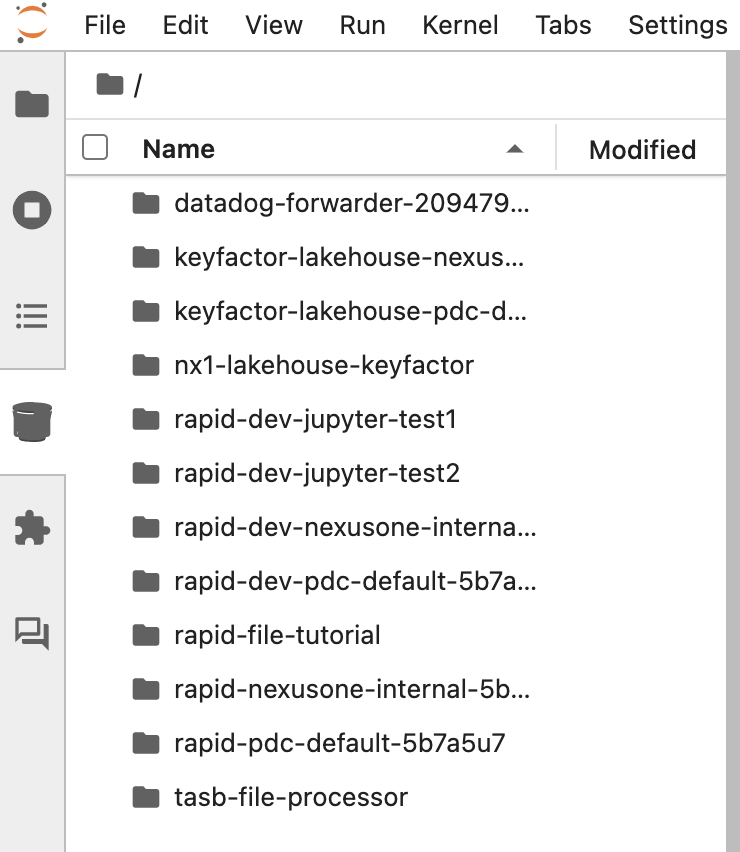
Object storage browser for S3
You can access S3 buckets or your object store using the UI. Some of the key features include the following:- Browsing all authorized buckets
- Downloading files
- Previewing CSV, JSON, and text files
- Uploading new objects
- Navigating through large datasets
- Copying full S3 URIs used directly in PySpark, Trino, or spark-submit jobs
- Ranger policies control access to the bucket.
- If you don’t see a bucket/path, that means you aren’t authorized.
- Checking raw vs. processed data
- Inspecting files before running Spark jobs
- Validating daily partitions or incremental loads
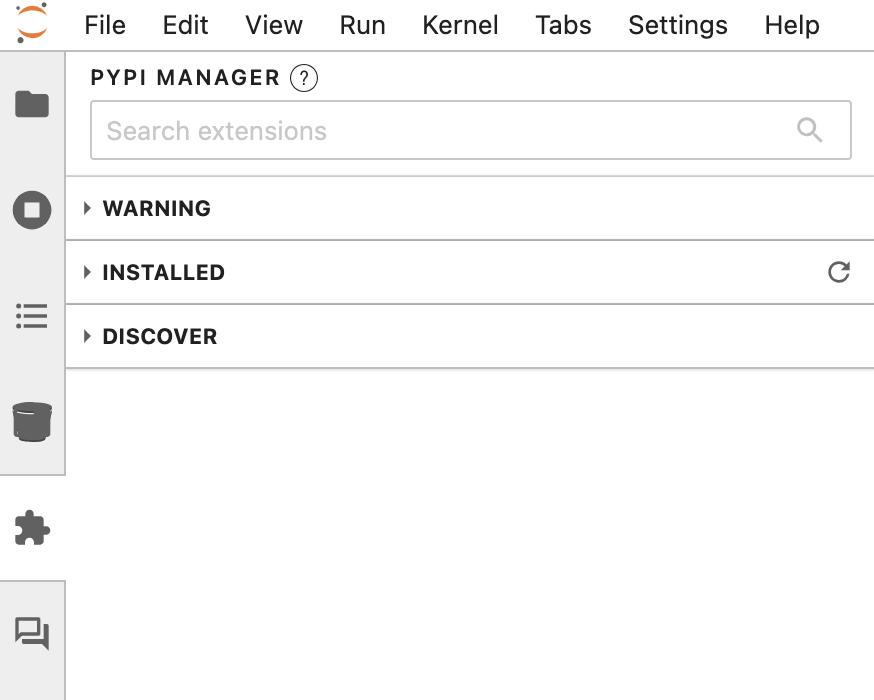
Extension manager
You can turn on or turn off JupyterLab extensions, which are UI plugins. Some key sections include:- WARNING: Alerts for extensions that are incompatible, blocked, or require server-side changes
- INSTALLED: Lists all extensions currently installed and enabled in your Jupyter environment
- DISCOVER: Browse discoverable extensions that you can request for administrator approval
- Enabling additional syntax themes
- Enabling development helpers
- Checking installed UI extensions
Jupyter AI chat
You can chat with an AI assistant directly inside JupyterHub. Some of the key features include the following:- Generating code snippets
- Explaining Python/Spark errors
- Assisting with documentation
- Helping with SQL queries
- Providing inline suggestions while working
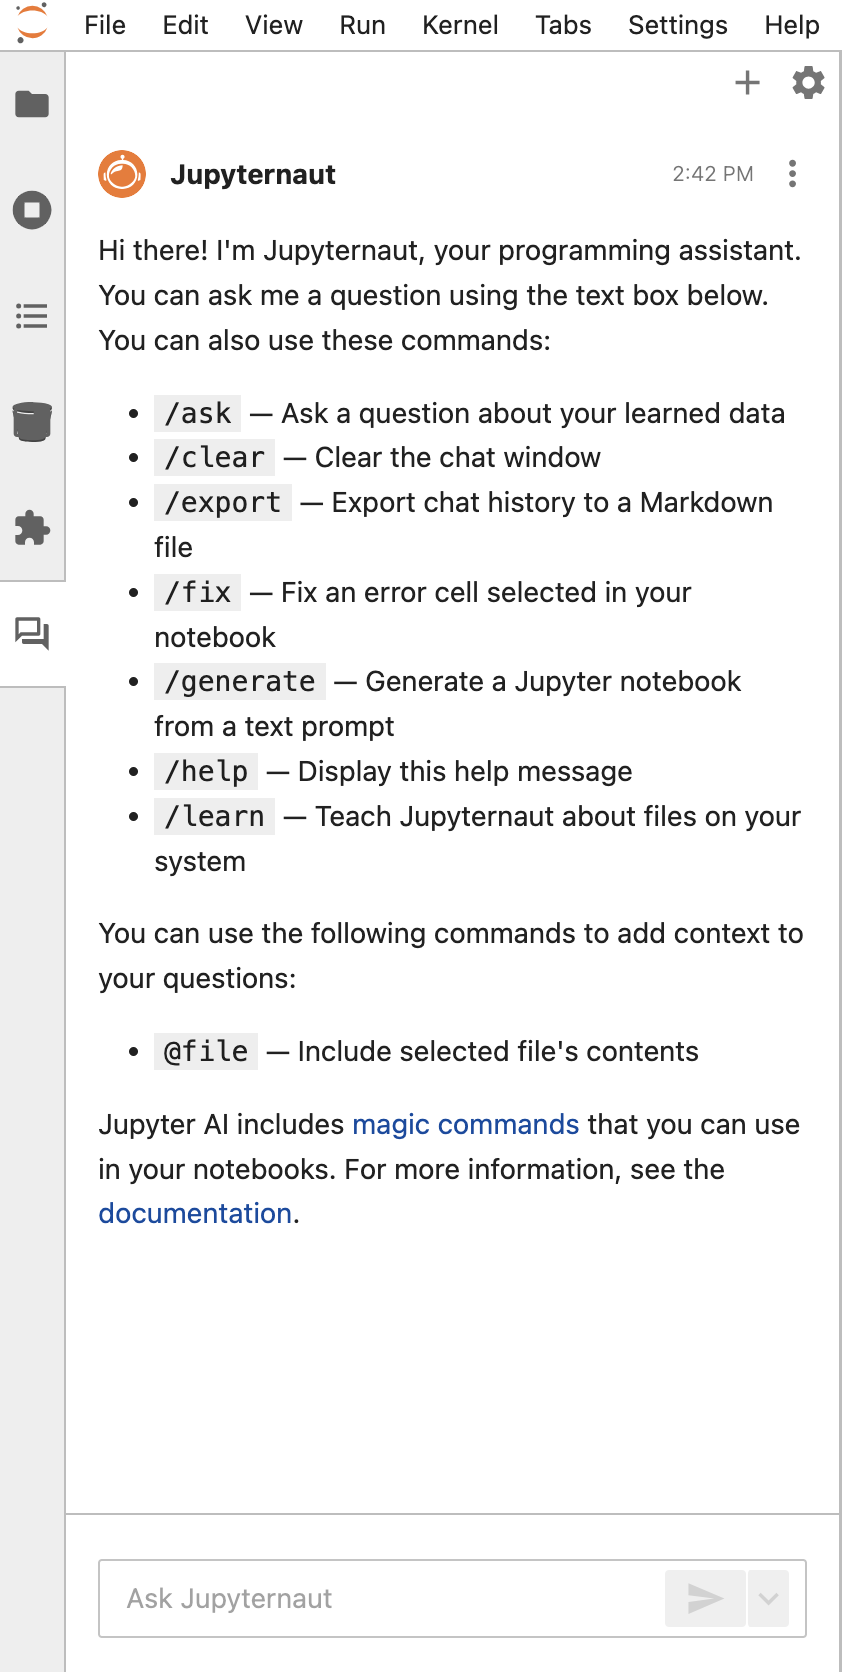
It doesn’t access your data unless you paste it.
- Getting quick help or code explanations
- Producing sample transformations
Additional resource
- To learn about best practices when using JupyterHub, refer to the JupyterHub best practices for users page.
- To learn practical ways to use JupyterHub in the NexusOne environment, refer to the JupyterHub hands-on examples page.
- For more details about JupyterHub, refer to the JupyterHub official documentation.