Exploring the Airflow UI
The Airflow UI provides a web-based interface to view and manage DAGs. It shows task status, schedules, logs, and some configuration controls. You can launch Airflow using the following designated URL:When you purchase NexusOne, you receive a client name.
Replace
client with your assigned client name.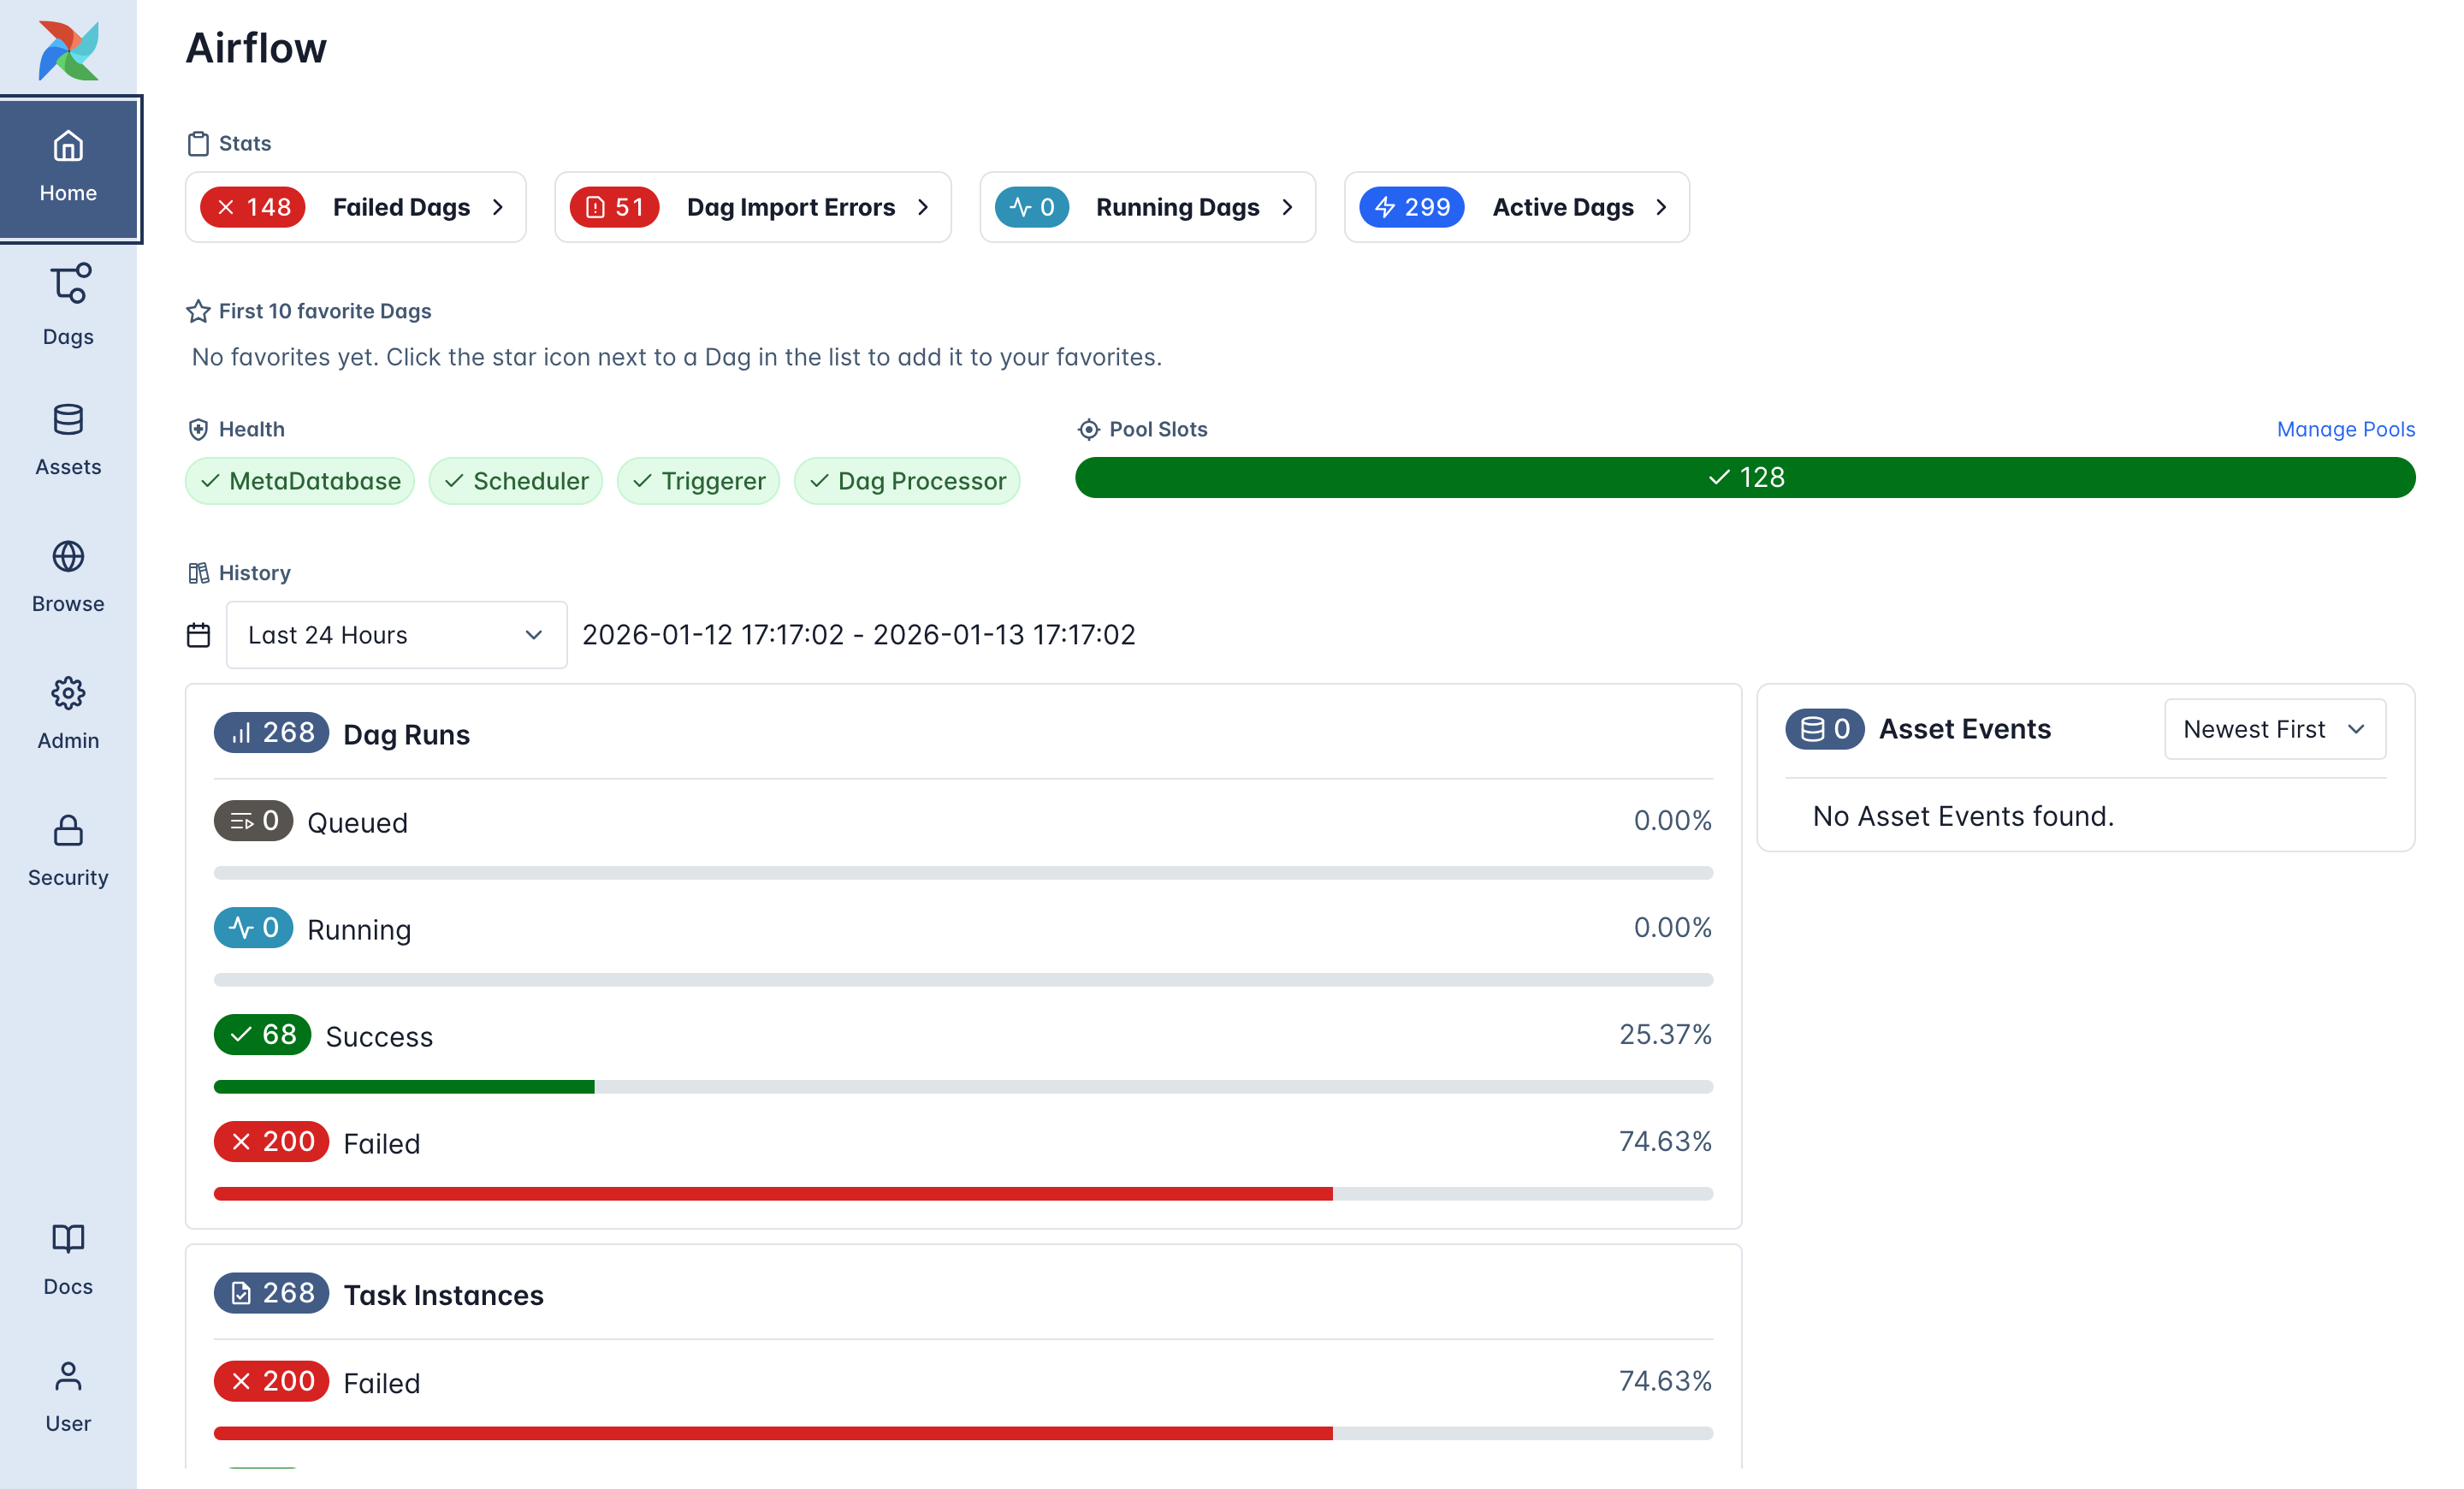
Airflow homepage layout
What is a DAG?
As previously described, in Airflow, a DAG or Directed Acyclic Graph represents an entire workflow. It defines what tasks exist, when the workflow runs, and how it handles failures and retries. A Python file defines each DAG. The DAG doesn’t perform any computation itself, it only defines the structure and scheduling of tasks.Where DAGs live in NexusOne
In NexusOne, Airflow loads DAGs from the/opt/airflow/dags path, while you can author DAGs
in JupyterHub under the /home/<user>/dags path. Any valid Python file placed in the Airflow
DAGs directory is automatically detected and scheduled.
In the JupyterHub path,
user refers to your NexusOne username.Core DAG components
Every Airflow DAG consists of a set of core components that control how and when it runs. A combination of default arguments and DAG-level parameters defines these components and controls scheduling, fault tolerance, execution behavior, and platform-level workflows. The core components include:dag_id: Unique identifier for the workflowowner: Team or system responsible for the DAGretries: Number of retry attempts for failed tasksretry_delay: Time to wait between retriesstart_date: Date from which the DAG becomes eligible to runschedule/schedule_interval: When the DAG should runcatchup: Whether to backfill past runs or only run from now onward
DAG owner and authorization
Each DAG includes anowner field in the @dag decorator. This owner identifies the
user, team, or service account under which the workflow executes.
DAG naming conventions
To ensure clarity and maintainability, DAGs should follow a consistent naming pattern.ingest_banking_files.pytransform_sales_daily.pyquality_customer_checks.pyplatform_health_canary.py
dags/. All workflow definitions, such as
Python files containing @dag or DAG objects must live within this directory. These definitions are then
picked up and scheduled by the Airflow scheduler.
Shared, reusable logic is typically stored in a sibling utils/ directory. Files in this utils/ directory
contain common functions used across multiple DAGs, such as configuration loaders, Spark session
helpers, validation logic, and API clients.
A file tree sample:
utils/, for example:
Additional resources
- To learn practical ways to use Airflow in the NexusOne environment, refer to the Airflow hands-on examples page.
- If you are using the NexusOne portal and want to learn how to launch Airflow, refer to the Monitor page.
- For more details about Airflow, refer to the Airflow official documentation.