Prerequisites
- An existing AWS, Azure, or Google Cloud account
- Appropriate NexusOne permission:
nx1_ingest,nx1_monitor,nx1_s3_admin,airflow_user,superset_user,spark_sql, andtrino_admin - Command line tools from AWS, Azure, or Google Cloud installed
- mysql command line tool installed
- Terraform installed
Authenticate to your public cloud
Use your public cloud’s command line tool to authenticate to your cloud account. This allows Terraform to interact with your cloud account.- AWS
- Azure
- Google
The following AWS command requests that you enter the following AWS credentials:To create an access key ID and secret access key, refer to
How IAM users can manage their own access keys in the AWS documentation.
- Access key ID
- Secret access key
- Default region
Define a Terraform and cloud provider
After authenticating to your cloud account using the command line tool, create the following Terraform file.Define a MySQL instance
This step defines Terraform resources required in this tutorial for deploying the MySQL database. Create the following Terraform file.Deploy the MySQL instance
After defining the MySQL Terraform resource specific to your cloud provider, take the following steps to deploy the Terraform resources.-
Initialize the Terraform configuration.
-
Create the MySQL instance.
Add datasets to the database
To ingest datasets from the database into NexusOne, these datasets need to exist first. Take the following steps to add datasets to the database:-
Authenticate to the database using the mysql command line tool.
- AWS
- Azure
- Google
-
Create a schema.
-
Create a table inside the
tutorialschema. -
Insert data into the table.
-
View all rows in the
testtable.
Ingest the database into NexusOne
Now that a dataset is available on the MySQL database, you can ingest the database into NexusOne using the following steps:- Log in to NexusOne.
- From the NexusOne homepage, navigate to Ingest > Database > From Table.
- Enter the table and schema name:
- Source Schema:
tutorial - Source Table:
test
- Source Schema:
- Add connection details:
- Database URL:
jdbc:mysql://<database_URL_or_public_IP>:3306/tutorial
- Port 3306 is MySQL’s default port number.
- In MySQL, a database name is also a schema name.
- Username:
mysqladmin - Password:
NexusMySQL!
- Database URL:
- Add ingest details:
- Name:
ingest_database - Schema:
mysql_schema - Table:
mysql_table - Schedule:
Run Once - Mode:
append - Tags: Don’t add any tags.
- Name:
- After configuring all fields, click Ingest to submit the job. Wait for a few minutes until you see a success message appear with an option to click View Jobs.
Monitor job
When you ingest the database, this creates an Airflow job. To monitor the status of the job, use the following steps:- Click View Jobs, or navigate to the NexusOne homepage and then click Monitor.
- Find your job name,
ingest_database, in the list, and watch its current status. - Wait for a few minutes, and then refresh your browser until the status changes to
Completed.
Visualize your dataset
Use the following steps to visualize your dataset:- On the NexusOne homepage, click Discover to launch Superset.
- Hover your mouse over SQL, and then select SQL Lab.
- Enter the following command in the query box:
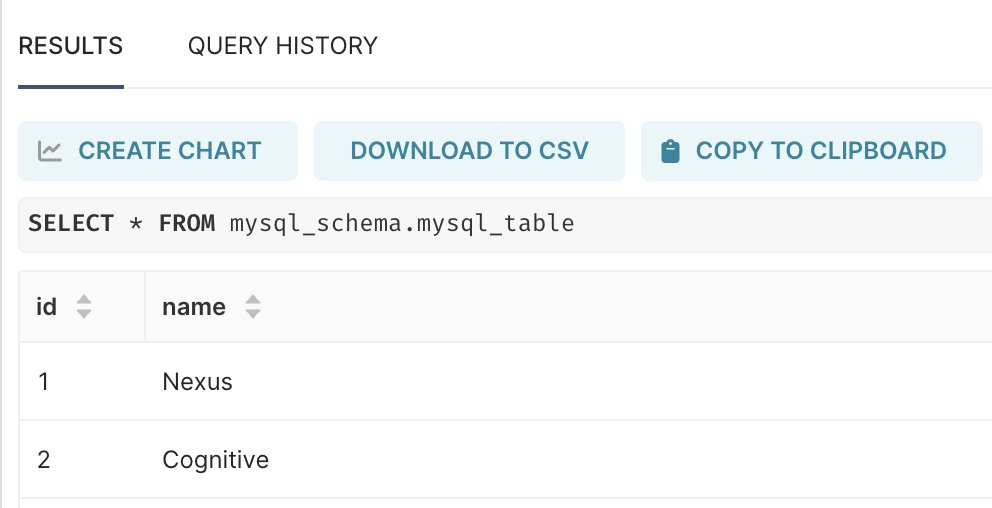
Visualize your dataset
Delete the schema and Terraform resources
After completing the tutorial, delete the created schema and MySQL instance using the following steps:-
Delete the schema.
-
Destroy the Terraform resources.
Additional resources
- To get an overview of what database ingestion is, refer to Data ingestion overview.
- For more information about roles or permissions, refer to Govern Overview.